


ArchiFacade - How to straighten a perspective view
How to straighten a perspective view.
The theory about the perspective views straightening is one of most fascinating and surely one of the most discussed among the thematics about the descriptive geometry.
In the today market, where restoration and remodeling of the existing buildings is quite a common task, this technique of representation of historical buildings is getting more and more importance.
Often the designer needs to represent an existent building both for survey purposes and for contextualizing his new buildings.
ArchiFacade addresses this issue for all the ArchiCAD users.
Let's see a simple example about ArchiFacade utilization.
In this example, the designer has to design the interior of an existent historical building, in other words his job doesn't involve the building exteriors (which can be legally bound for their historical value).
The "external box" of the building won't be modified or the eventually little modifications (signs insertion, doors and windows frames substitution, etc.) do not involve the building "skin".
In such case, often it isn't worth to three-dimensional build the whole building or, at least, the designer want to save money of accurate survey jobs.
It's much more simple to take a photo of the building facade and use it as the "base" to "rebuild" all the facade elements both if you want to create two-dimensional drawings of the fronts and if you want to create a 3D model of them (maybe using ArchiForma!).
But it's quite difficult to take a perfect frontal photo of the building: big building sizes, little frontal space conformation and dozen of other difficulties often prevent using in taking a frontal picture so, at end, we are only able to take a foreshortened view where sizes and alignments changing in the image depending on the perspective rules.
ArchiFacade helps us to straighten these images: it can deform the perspective view in order to get a perfect frontal view.
It's funny how, deforming a distorted view (the perspective photo), we get a regular view (the frontal view).
Let's see how we can get this result.
Take a picture of the building using a regular lens, avoid using wide-angle lens which deform too much the view giving them the typical fish-eye effect: the perspective lines can be straightened but the curved lines (typical result of a fish-eye lens) at the end will still be deformed.
If the building facade is very large or if the place in front of it (where we take the picture) is very little if could be better for you not to take just one photo of the whole facade, but several pictures: then using the tiles technique we can elaborate each single photo and then collect them all together.
Before coming back to your office (primary importance!), remember to take some measurements: the mathematics rules behind ArchiFacade (based on the survey golden rules!) need a few dimensional data... just one picture isn't enough to get the required result.
Which measurement do you need?
Simple!
The simplest method needs the positions of four points laying in the facade plane: in this case we need four couples of Cartesian coordinates.
It's very easy either if you have and you do not have a theodolite: simple take two measurements the length and the height of your facade.
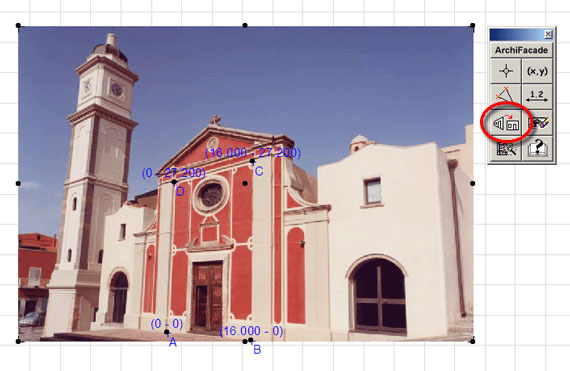
As you can see in the following image, with these two sizes, we can get the four needed couples of coordinates:
The bottom left corner is the first point: 0, 0
The bottom right corner has coordinates: measured length, 0
The top right corner has coordinates: measured length, measured height
The top left corner has coordinates: 0, measured height
Let's come back to our photo and let's answer to the common question:
Which sizes/resolution/color depth do we need?
Of course, the bigger and more defined is the photo, the better is the result... and also the needed elaboration time!
Due to the photo purpose/utilization (we will use it as the base for our drawing, or to get the facade sizes, and also in our rendering), we suggest you to take a photo of 1024x768 pixels, 72 dpi with millions of colors.
When you don't use a digital camera, which implies you are using a scanner to digitalize your normal photo, please, increase the picture sizes rather than the image resolution (the result is just the same!).
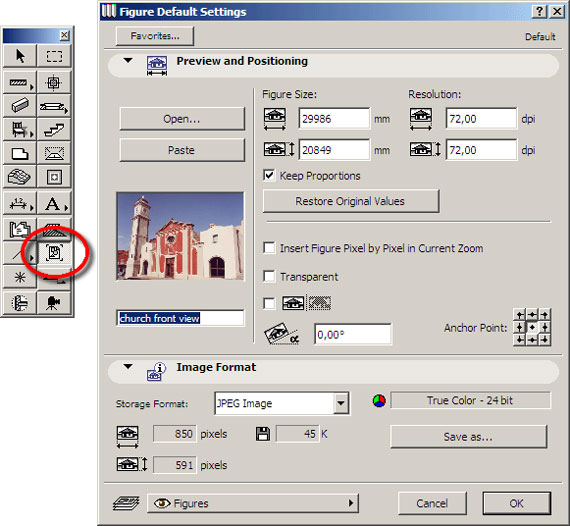
Now let's start ArchiCAD and import the picture by using the ArchiCAD Figure tool.
Don’t resize the picture, don’t rotate it, don’t scale it!
All these actions should be useless: ArchiFacade will automatically do anything you need!
Now, let's insert the four fixed points, by following this simple procedure:
- Click on the Fixed Point ArchiFacade icon tool.
- Click four times on the image in order to define the four Fixed points location, then type the requested coordinates in the appearing ArchiFacade dialog window.
Now select all the elements (the four points and the picture) and straighten the image by clicking on the ArchiFacade Straighten tool icon.
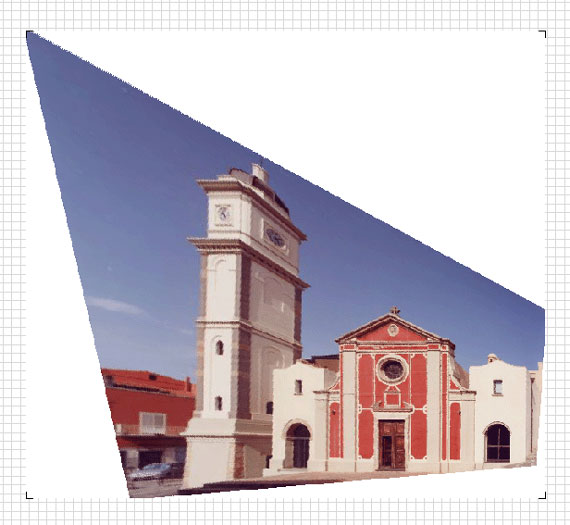
Simple, isn't it?
The result is a frontal view from which you can take any measurement you need.
You can use it as the base to draw the facade by using the ArchiCAD 2D tools, or you can use it as the base to build the 3D models of the facade details (maybe using ArchiForma?).
But we have also another possibility: we can use this straightened photo as "skin" for the box of our 3D model. In this case, we can save a lot of time just because we will need to build less elements (balconies, columns, roofs: whatever might jut out of the wall or anything new, I mean anything we designed ex-novo).
How can we do this?
Simple!
Using the ArchiCAD Fill tool, frame the photo by defining the outline of the building facade.
Remember to frame the windows/door too (by creating hole in the fill) because, in this way, the result will be driller and you will see your 3D doors and windows through the final skin.
Now select both the fill and the picture and click on the ArchiFacade Create Object tool icon.
This procedure could also be used to create the skins of the existent building surrounding our project: in this way it will be simpler and faster to create the contextualization around our building.
The final result will be a "special panel", something like a silhouette of the building facade, which will use the selected photo to represent the building in the ArchiCAD photo-renderings.