


ArchiTiles 2

Plug-in ArchiCAD for Tiles Creation, Placement and Calculation.
With ArchiTiles 2 tiles aren't still static objects. Tilings can modify themselves due to element's changes and can be also holed.
ArchiTiles 2 is included inside ArchiSuite 18 e next versions, you can't find it in previous versions of ArchiSuite.
Compatibility with previous versions and advice to users of previous versions
The working philosophy of this new version of ArchiTiles is completely different from that used in previous versions. This has greatly improved use of the plug-in, but it also means there are a number of limitations with respect to previous versions.
As it uses different procedures and objects, this new version is NOT compatible with previous versions. You can, however, install it alongside these. This means you can modify old projects using previous versions, while enjoying all the benefits of the new version for new projects.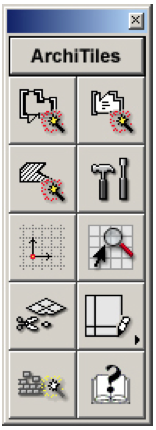 Fundamentally, the main innovation in this version is the end result. With previous versions, the end result (vertical tiling of walls or horizontal tiling of slabs and ceilings) was a non-editable GDL object which could not therefore be updated in any way. If the user modified the host elements (the walls and slabs covered with the tiles), all ArchiTiles elements had to be eliminated and the modified parts hat to be tiled again.
ArchiTiles 2 on the other hand uses a completely different technology (similar to ArchiCAD accessories) allowing the tiling to be updated/modified at any time.
Changes following modification of the host elements (the elements tiled using ArchiTiles), or changes to the tile layout (materials used, laying schemes, levels, etc.) can be made quickly and easily at any time.
ArchiTiles is provided with a series of predefined laying schemes, but you can also define your custom laying schemes through the creation of a pattern by the user. Inside walls tiling you can include also mouldings and define whatever number of horizontal bands tiling with different laying schemes.
Other implementations are related to surface materials, to their changes after tiling, to side junctions and to angle solutions, but, most of all, with ArchiTiles 2 tilings can be holed and this let you personalizing better the laying drawing.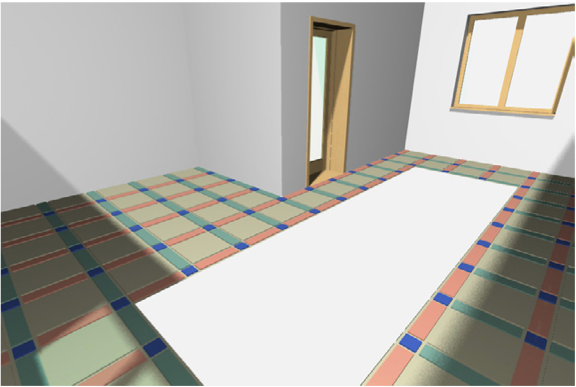
The capability to make a hole in the tiling let you also insert an hole in another tiling completely different from the first one.
As just happened in the past with ArchiTerra and other plug-ins, switching from a version to another of the plug-in, also it's core change, increasing it's capabilities and peformance, but the base working method is the same, so it is still easy to manage.
This happended also to ArchiTiles 2: all start as usual from the Zone ArchiCAD's tool. The user select a zone that let ArchiTiles 2 to identify the working area and to build the tilings for walls, floors and ceilings.
It is possible to do the same on an Hatch (on plan and on section window), but, first of all, you need to select the hatch to let ArchiTiles 2 know the working space.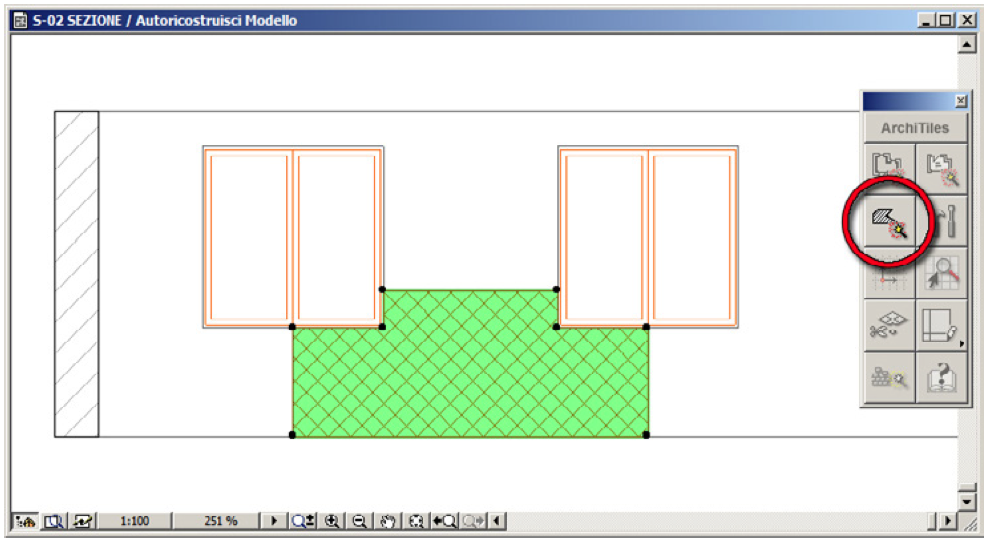
Laying created with ArchiTiles 2 starting from an Hatch inside aa ArchiCAD's Section/Elevation window.
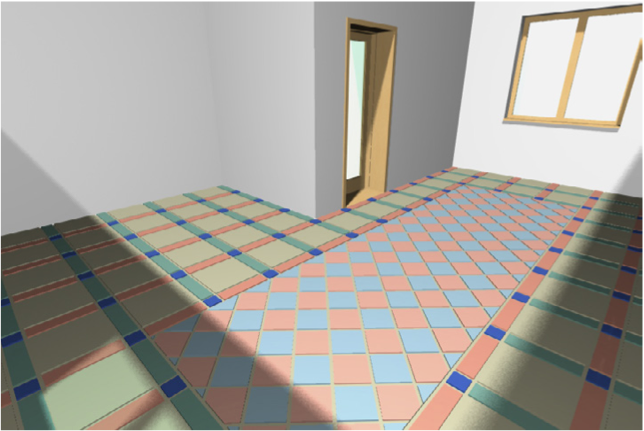
By the Tool Palette is possible to configure the layings, the joints, the side junctions, the materials, the cuts, the compute, etc.. Inside the User Guide there is a full description of all tools. From ArchiTiles 2 Tool Palette you can start the User Guide by double-clicking on the last tool.
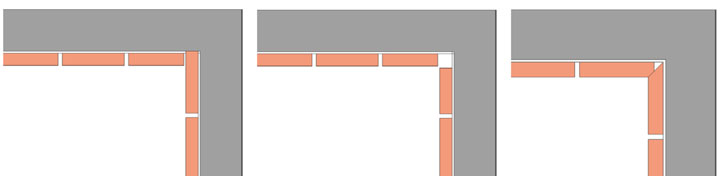
3 examples of side juctions without tiles overlapping, in the first example is enable an offset only for a single area of tiling, in the second offset is apply to both areas of tiling, in the third one bevel the side junctions along the bisector of the angle between areas of tiling and on the horizontal area of tiling we have an offset about half tiles thickness.
ArchiTiles 2 let you build up also custom laying schemes, defyning some custom patterns that will be repeated in both horizontal and vertical ways in order to fill all the selected area. This can be done graphically, without using the GDL language. More complex if the geometric rappresentation of the laying scheme, more difficult if to manage it. The same is for custom profiles, used for frames and moldings that adorn the walls cover with tiles.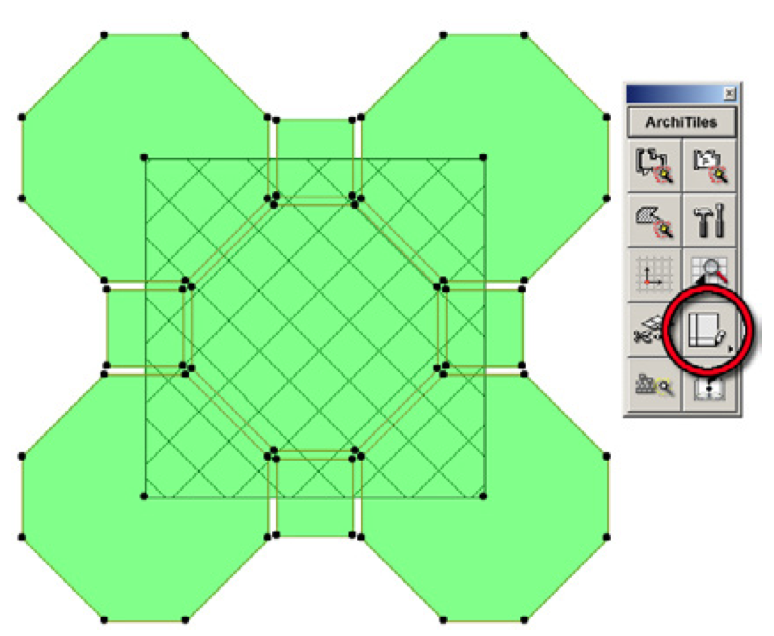
To place octagonal tiles with square joints, it is necessary to define the module more strict than possible (the hatched square) so that it can be repeated.
One of the most important features of ArchiTiles 2 is the automatic update of the tiling objects to adapt them to changes made to the host object.
To explain it in a simple way, if you move and resize a window of a room tiled using ArchiTiles 2, the tiled area will automatically adapt to new window place and size, like occur with ArchiCAD's Wall Accessories.
A suggestion to work more easily with ArchiTiles 2
Like all ArchiCAD's add-ons (also ArchiSuite ones), ArchiTiles 2 work inside of ArchiCAD and use some of it's settings, as the Working Units Preferences. The first suggestion is to set the Model Unit to meters with 3 decimals, the second is to be genorous with joints deepness, so you will obtain rendering with a best definition of the tiles's border, most of alkl the ones with the same material.
ArchiSuite System Requirements
The add-ons require the same configuration as your version of ArchiCAD.
- After downloading, click on the file and an Installer will put the Add-Ons in the correct folder of ArchiCAD
- After the Installer finished, it is necessary to prepare the Cigraph-Dongle. Put it into the computer and lunch ArchiCAD. From the menu: Design- Extradesign select “Cigraph Liccenze Activation” and follow the instructions.
ArchiSuitePlus download must be related to the ArchiCAD version and Operative System in use.
To ease your life we developed a dedicated "Installer", which starts after downloading ArchiSuitePlus.
ArchiSuitePlus
| ArchiCAD 20 | 23 November 2016 |  |
 |
| ArchiCAD 19 | 23 November 2016 | |
|
| ArchiCAD 18 | 23 November 2016 | |
|
| ArchiCAD 17 | 23 November 2016 | |
|
Updates and bugs fixing
ArchiSuitePlus for the current and the previous ArchiCAD version are constantly up to date, as soon as new new bugs arise. When you launch ArchiSuite, it immediately advises you for new updates available for free download.
Remember to quit ArchiCAD, before installing any ArchiSuitePlus Update.
Back to:
Actual Plug-ins Collection:
- ArchiTerra 3
- ArchiForma 2
- ArchiTiles 2
- ArchiTime
- ArchiStair 2
- ArchiPanel
- ArchiMap
- ArchiQuant 2
- ArchiGiallieRossi
- ArchiTools
More info about: