Starting from version 16, ArchiSuite doesn't contain ArchiWall 2, its best features are now collected into the new ArchiTools.
Description
With the ArchiWall 2 add-on, you can add "overlaid-structures" to normalArchiCAD walls, transforming simple prismatic blocks into multiform construction elements.
The elements created are single instances of a library part which interacts with the add-on, but can also be used independently, although with some limitations.
This allows you, for example, to send your project to a colleague who does not have ArchiWall, without the risk of supplying him with an incomplete image.
You just have to remember to send him the ArchiWall library as well, or to save the project in Archive format.
The element created by ArchiWall has all the geometric characteristics of the original wall, including trims to roofs and openings created for doors and windows. The object maintains a link with the original wall, with the possibility of automatic (in real time) or manual updating, but the link is not binding. Unlike ArchiCAD "Accessories" objects, ArchiWall objects can remain present and functional, even if you decide to delete the wall used to create them.
Working method
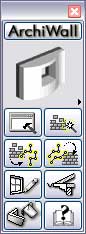
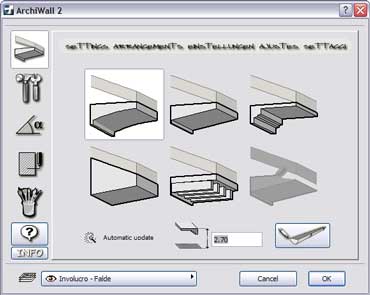
Using ArchiWall 2 is simple. Select the wall you wish to "connect" the object to and choose one of the seven transformation types from the palette.
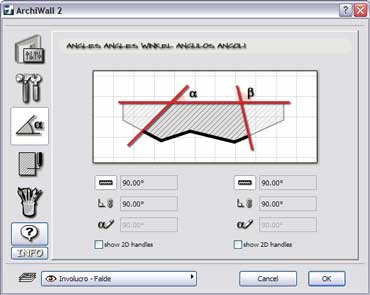
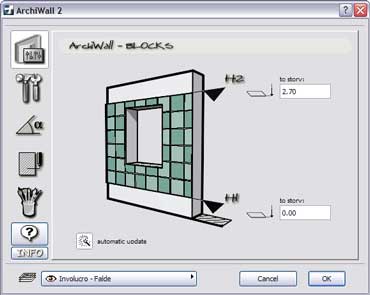
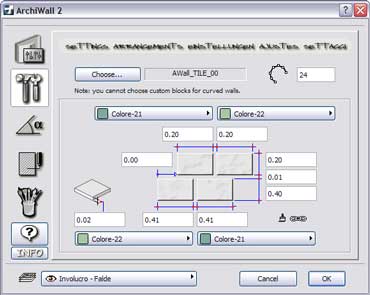
By accessing a settings window found in each transformation type, it is possible to decide: what materials to use for the object, the starting level and total height, the plan attributes and the plan section level.
Because it is connected to the wall, the object created also inherits its door and window openings.
If, the host wall is modified after the element has been created, or, the doors and windows have been added or removed, or modified you only have to select the ArchiWall element and click the "Data Update" button in the ArchiWall palette. Updating can also be carried out by enabling the "Automatic Update" option from the element's settings window.
All of the settings assigned to the elements can be modified even after they have been positioned in the plan by selecting the proper button in the palette or by directly selecting the object by entering the settings window.
For the transformation types supplied by the shape definition, as profiles or paths, it is possible, after having created the ArchiWall element to re-obtain, using the "Explosion" button located in the ArchiWall palette, a copy of each element.
This option allows you to modify the geometry of the elements created and to reuse the same profiles and paths on other walls.
Once the geometry of the exploded element has been modified, it is possible to regenerate them by clicking on the "Geometry Update" button.
ArchiWall objects are connected to the host wall, but are not dependent on it.
This means that the host wall can be deleted after the desired element has been created, making it possible to view only the outline of the object when creating furnishings or decorative elements.
ArchiWall also makes it possible to export the elements created to other file formats and enables documents to be exchanged among co-workers without the risk of providing an incomplete image.
Just remember to supply other users with the ArchiWall library or save the project in Archive format.
Elements created with ArchiWall maintain all of the geometric characteristics of the walls from which they originate, including the cuts made with roofs and door and window openings.
ArchiWall objects can also be edited using Archicad, though with limited functionality.
One of the new tools displayed in the ArchiWall 2 pallette allows the user to create custom windows, niches and openings just defining their shape with a fill.
The tool can be used (with slightly different procedures) in the Floor Plan or Section/Elevation views and a Settings Window will appear showing the normal Window tool settings dialog.
In the user interface panel named ArchiWall the user can choose whether to create a niche, a simple hole without window or a complete window and also access other settings to enter the sizes and resolution for curvedlines in the various numerical fields.
Using the same buttons on the right side, the user can access the usual Archicad window's settings and moreover pens, materials and grid in a very intuitive way.
When you click on the Moulding Creation tool, the ArchiCAD cursor is marked by a small circle prompting you to define the reference wall face.
Given that the same moulding is generally used on a number of façades or on a number of buildings in the same group, this command is cyclic.
This means that after you have clicked the side of the first wall, the cursor will remain marked by a small circle and you can go on indicating further walls on which you want to position other mouldings.
These will all be defined together and will all therefore be identical. You can, however, edit them later, even individually.
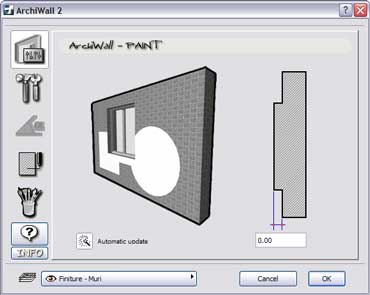
The 3D colour function can be used to create arbitrarily shaped areas of colour on the surfaces of linear and trapezoidal walls.
In the Section/Elevation view, trace out the area to be coloured on the wall using the Fill tool, then select the Wall and Fill together and click on the 3D Colour button.
A Settings Window similar to the others will appear and allows the user to set the Automatic Update, the Resolution for curved sides, the pen used to trace the outlines of the element in the 3D window, of course the Materials ant that's all... but it's also possible to modify each single parameter every time the user likes.
ArchiSuite System Requirements The add-ons require the same configuration as your version of ArchiCAD.
ArchiCAD Version
ArchiSuite is compatible with ArchiCAD 17 and subsequent versions and it does not work with previous versions of ArchiCAD.
Installing the package
Installing ArchiSuitePlus has to happen in 2 steps:
After downloading, click on the file and an Installer will put the Add-Ons in the correct folder of ArchiCAD
After the Installer finished, it is necessary to prepare the Cigraph-Dongle. Put it into the computer and lunch ArchiCAD. From the menu: Design- Extradesign select “Cigraph Liccenze Activation” and follow the instructions.
Custom Work Environment
If you use personalized ArchiCAD custom work environments, the add-on menu might not appear automatically in the ArchiCAD Design menu.
To show the Work Environment Manager dialog, click on Options/Work Environment.
Use this dialog to configure your custom work environments to include the menu for the new add-on.
Managing the object library
We recommend not moving the libraries used by the add-on from their original location (in the same folder as the add-on).
Here they will be managed automatically by the add-on and you will not experience any difficulty loading them.
ArchiSuitePlus download must be related to the ArchiCAD version and Operative System in use.
To ease your life we developed a dedicated "Installer", which starts after downloading ArchiSuitePlus.
ArchiSuitePlus
ArchiCAD 20
23 November 2016
ArchiCAD 19
23 November 2016
ArchiCAD 18
23 November 2016
ArchiCAD 17
23 November 2016
Updates and bugs fixing
ArchiSuitePlus for the current and the previous ArchiCAD version are constantly up to date, as soon as new new bugs arise. When you launch ArchiSuite, it immediately advises you for new updates available for free download. Remember to quit ArchiCAD, before installing any ArchiSuitePlus Update.